Your first deploy
Sign up, connect Git, choose a static site or web service, and open a live HTTPS URL on seenode in about five minutes.
Last updated September 18, 2026
Run your first app on seenode in about five minutes. You will sign up, connect GitHub, create a static site or a web service, watch the build, and open a live HTTPS URL. We provide a sample repo so you do not need to write code.
New to seenode? Start free: 7-day trial, no credit card.
1. Sign up
Create a seenode account if you do not have one. The trial starts when you create your first service.
2. Connect your Git provider
You need a repository on GitHub or GitLab. For this tutorial, use one of our templates (next step). When you create a service, authorize seenode if the dashboard asks.
3. Choose a service type
| Type | Choose this if | Sample |
|---|---|---|
| Static site | Your app builds to HTML, CSS, and JS (SPA, docs, marketing page) | Use your own Vite/React build, or follow Static sites |
| Web service | Your app is a process that listens for HTTP (API, SSR, Flask, Express, …) | Flask greeting app |
This walkthrough covers both. Use the static tab if you already have a frontend repo; use the web tab for the Flask sample.
4. Deploy your code
Use this path when you already have a repo that builds to a folder (dist, build, or out).
-
Create a Static site
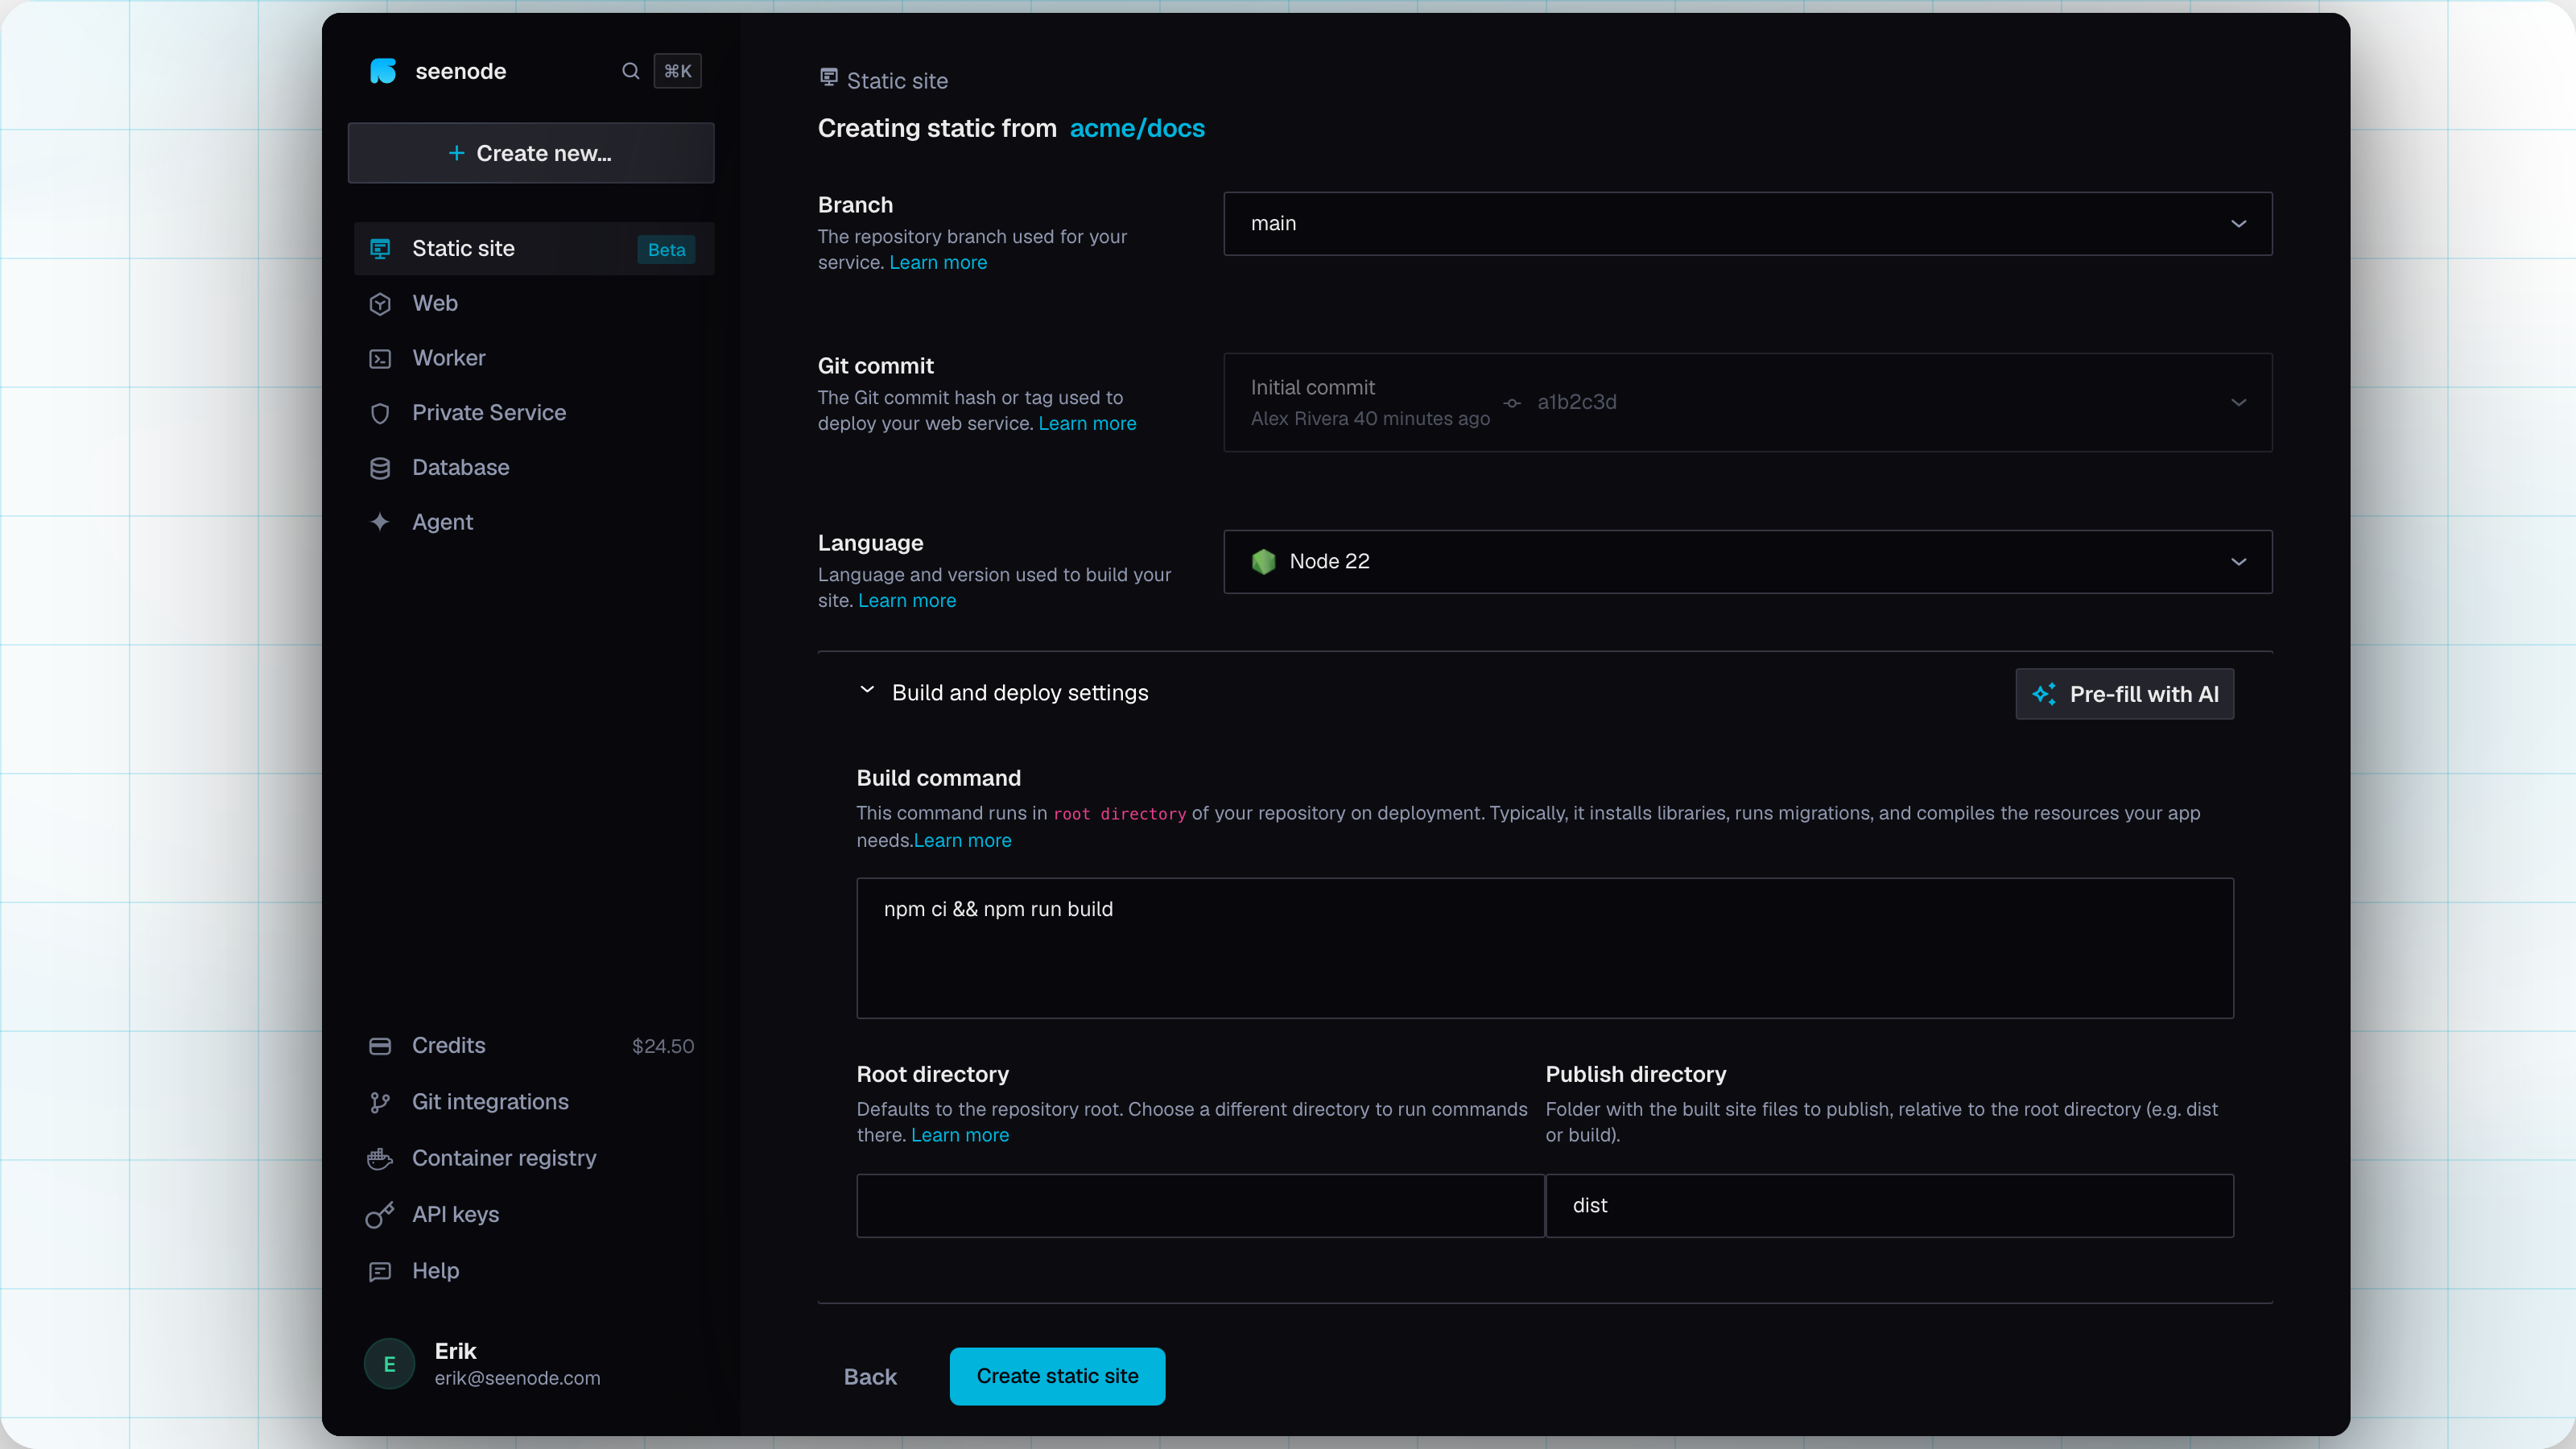
In the dashboard, choose Static site and connect the repository.
-
Build settings
- Build command — for example
npm install && npm run build - Publish directory — the folder that contains
index.htmlafter the build - Client-side routing (SPA) — leave on for React / Vue / Angular history-mode apps
- Build command — for example
-
Create
Create the site and watch Logs until the build finishes. Open the
*.seenode.appURL.Full detail: Static sites. Framework shortcuts: React, Vue, Angular.
Get the sample app
Open the seenode Flask template and click Create repository to put it in your GitHub account:
Create the example-flask repository →
Create the service
-
Open the dashboard
Sign in to the seenode dashboard. Select Web in the sidebar, then Create web service (or Create new… → Web service).
-
Connect the repository
Choose Git repository, pick GitHub, authorize if prompted, and select example-flask. Leave the branch as main.
-
Confirm the configuration
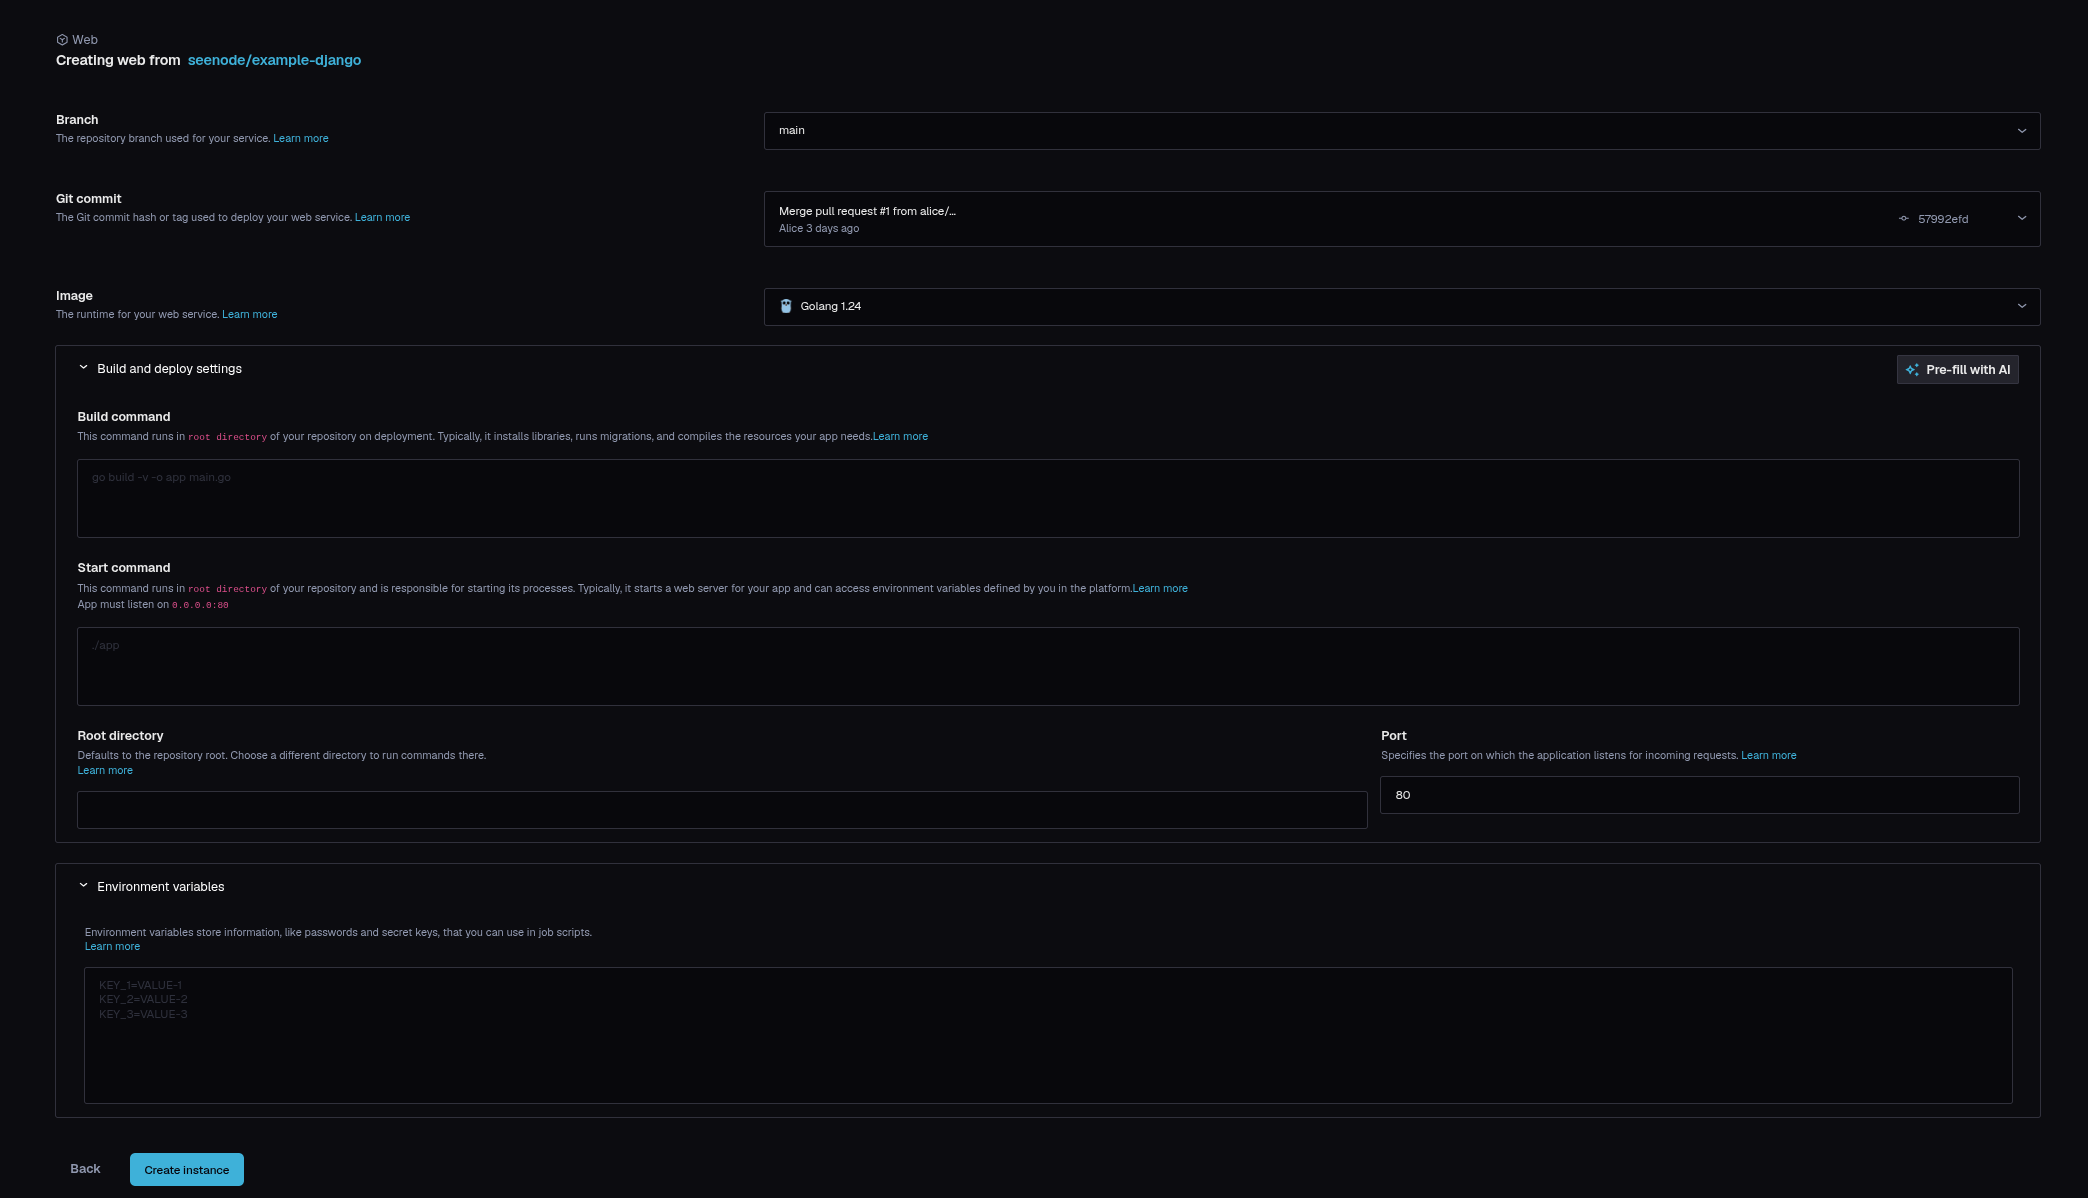
seenode detects Python and pre-fills settings. Confirm:
- Language: Python
- Build command:
pip install -r requirements.txt - Start command:
gunicorn app:app --bind 0.0.0.0:80 - Port:
80
Warning (Listen on 0.0.0.0 and the Port field)
Your process must bind to host
0.0.0.0and the exact port in the Port field. This template uses0.0.0.0:80and Port80. Leave them as they are. A mismatch is the most common cause of a 502 on first deploy. -
Create and watch logs
Click Create instance. The Logs tab streams the build. You will see stages like:
==> Cloning repo ...==> Using python ...==> Running build command "pip install -r requirements.txt"==> Build successful==> Starting application...==> Deployment successfulWhen status shows Deploy is live, open the
https://….seenode.appURL at the top of the service.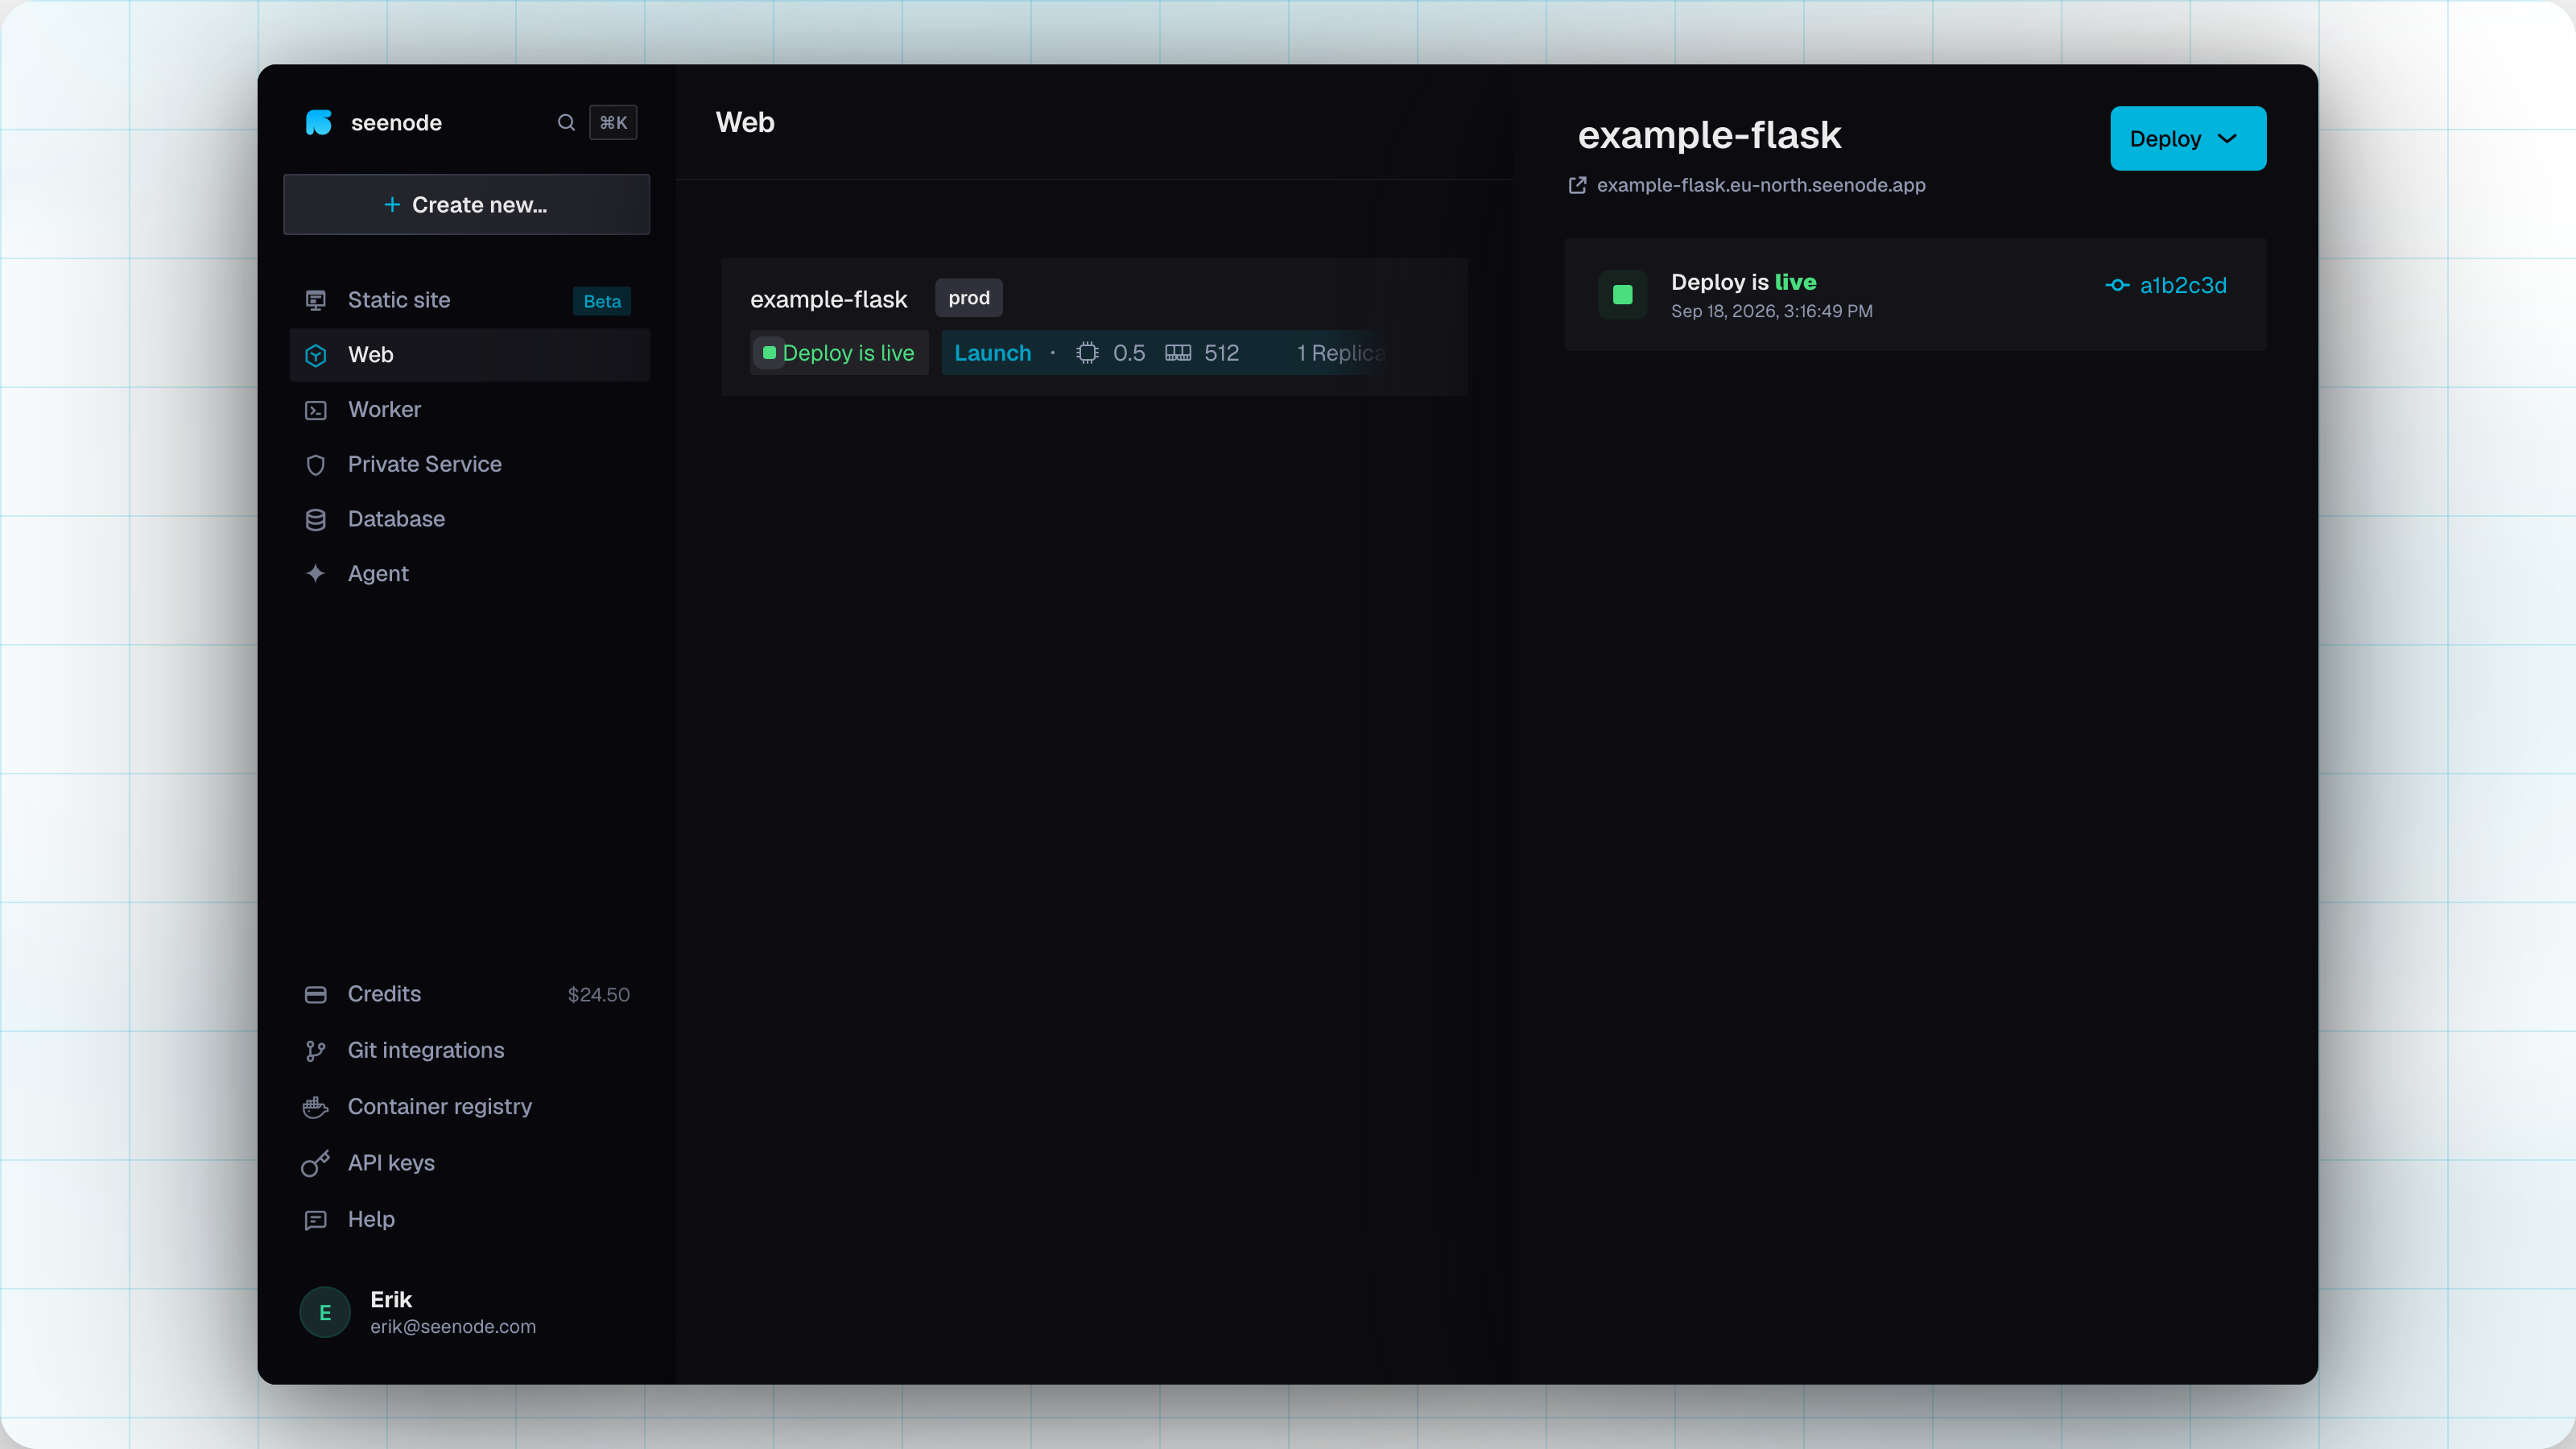
5. What you just did
For a static site, seenode ran the build and published the files — no start command, no container at request time. Hosting is $0.
For a web service, seenode pulled Git, ran your build and start commands, put the process behind a load balancer with a free TLS certificate, and gave you a public URL.
Auto-deploy is off by default. Enable it in Settings to rebuild on every push.
What’s next
Choose a service type
Static, web, worker, private, and databases — with a decision flowchart.What to do when it fails
Logs, 502s, failed builds, and credit suspensions.Add a database
Managed MySQL or PostgreSQL, then link credentials to the app.Custom domain
Point your own domain at the service, with automatic HTTPS.Frameworks
Django, FastAPI, Express, Next.js, Go, Phoenix, and more.Tip (Clean up)
Done experimenting? Delete the service from Settings → Danger Zone.