Deploy Django App on Seenode | Django Hosting & Deployment Guide
Deploy your Django app on Seenode with a simple setup. Follow our quickstart guide to configure, connect Git, and go live in minutes.
This guide explains how to deploy your existing Django application to seenode. For a production-ready setup, we recommend using a PostgreSQL database and WhiteNoise to serve static files.
Prerequisites
Before you begin, ensure you have:
- A seenode account at seenode.com
- Git configured on your machine
- Existing Django project ready to deploy
Configure for seenode Deployment
Production Dependencies
For a production setup, add these packages to your requirements.txt:
gunicorndj-database-urlpsycopg2-binary # Or the appropriate adapter for your databasewhitenoiseSettings Configuration
Update your settings.py for production deployment:
import osimport dj_database_url
# Security settingsSECRET_KEY = os.environ.get('SECRET_KEY')DEBUG = os.environ.get('DEBUG', 'False').lower() == 'true'ALLOWED_HOSTS = os.environ.get('ALLOWED_HOSTS', '').split(',')
# Database configurationDATABASES = { 'default': dj_database_url.config(conn_max_age=600, ssl_require=True)}
# Static files with WhiteNoiseMIDDLEWARE = [ 'django.middleware.security.SecurityMiddleware', 'whitenoise.middleware.WhiteNoiseMiddleware', # Add WhiteNoise # ... other middleware]
STATIC_URL = '/static/'STATIC_ROOT = os.path.join(BASE_DIR, 'staticfiles')STATICFILES_STORAGE = 'whitenoise.storage.CompressedManifestStaticFilesStorage'Tip (Environment Variables)
The following settings are configured via environment variables:
SECRET_KEY: Your Django secret key for cryptographic signingDEBUG: Set to'true'for development,'false'for productionALLOWED_HOSTS: Comma-separated list of allowed hostnames, for example:yourdomain.com,www.yourdomain.comexample.com,api.example.com,www.example.com
If you’re using seenode’s default service URL, you can find your service domain in the dashboard. Without setting ALLOWED_HOSTS, Django will reject requests and return a “DisallowedHost” error.
Build Script
Create a build.sh script to streamline deployments:
#!/usr/bin/env bash# exit on errorset -o errexit
pip install -r requirements.txt
python manage.py collectstatic --no-inputpython manage.py migrate
Make the script executable: chmod +x build.sh
Deploy on seenode
Push to Git
Commit your project and push it to GitHub or GitLab.
Create a Database (Optional)
If your application needs a database, create a PostgreSQL Database from the seenode Dashboard. seenode also supports MySQL.
Create a Web Service
Create a new Web Service and connect your Django project’s Git repository. Configure your build and start commands:
- Build Command:
./build.sh - Start Command:
gunicorn your_project.wsgi --bind 0.0.0.0:80
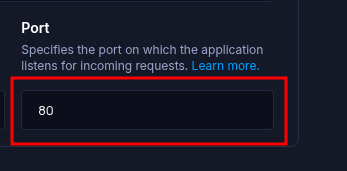
There is no default port. Set the Port field (above Environment Variables) to the value you expect Gunicorn to use (for example,
80or8080). Do not rely on aPORTenvironment variable, instead bind Gunicorn to the exact port you configure here.- Build Command:
Configure Environment Variables
Navigate to the Environment tab and link your PostgreSQL database.
Important: You must configure the following required environment variables (as referenced in the Settings Configuration section above):
SECRET_KEY: Your Django secret key for cryptographic signingALLOWED_HOSTS: Comma-separated list of allowed hostnames (e.g.,yourdomain.com,www.yourdomain.com). This is required for Django to accept requests from your domain.
Without setting
ALLOWED_HOSTS, your Django application will reject requests and return a “DisallowedHost” error.Choose Pricing Tier
Select your preferred instance size and create your service.
Deploy
Click Create Web Service and watch logs until your web service is live.
Success
Once complete, your Django application will be accessible via your service’s URL.
Tip (Troubleshooting)
If your deployment fails, the first place to check is the Logs tab in your seenode service dashboard. Build and runtime logs often contain valuable information for diagnosing issues.
Port configuration mismatch
- There is no default port. Ensure your application listens on the port you set in the Configure Build & Start screen (Port input).
- Adjust in framework config if needed (for example, update your
gunicornbind port). Do not depend on aPORTenvironment variable. - Seeing a 502 Bad Gateway? This often means your app is not listening on the configured port.
Starting from Scratch?
If you don’t have a Django project yet:
Option 1: Use our Template (Recommended)
Django Template
Deploy a Django project pre-configured with Gunicorn for production.Option 2: Create from Django Docs + seenode Setup
Follow the official Django documentation to create a new project, then return here for seenode-specific deployment steps.
seenode-Specific Setup Steps:
- Create Django project:
django-admin startproject your_project - Install production dependencies
- Configure settings for seenode
- Create build script
Next Steps
Now that your Django application is deployed, here are some things you might want to do next:
Set up a Custom Domain (Coming Soon)
Configure a custom domain to point to your new web service.Connect to a Database
Instantly scaffold and connect PostgreSQL and MySQL databases