Deploy Express.js App on Seenode | Express.js Hosting & Deployment Guide
Deploy your Express.js app on Seenode with a simple setup. Follow our quickstart guide to configure, connect Git, and go live in minutes.
This guide explains how to deploy your existing Express.js application to seenode.
Prerequisites
Before you begin, ensure you have:
- A seenode account at seenode.com
- Git configured on your machine
- Existing Express.js project ready to deploy
Configure for seenode Deployment
Port Configuration
Express.js has no default port. Your service must listen on the same port that you configure in the Port field for the web service. Choose a port (for example, 8080) and use it both in your code and in the dashboard.
If you need a refresher on how ports are configured and routed on seenode, see Configuring Your Application’s Port.
const express = require('express');const app = express();const port = 8080;
app.get('/', (req, res) => { res.send('Hello World\nWelcome to Seenode!');});
app.listen(port, () => { console.log(`Example app listening on port ${port}`);});::::note[Why this matters]
Express.js has no default port, so you must explicitly specify the port in your code. On seenode, there is no default container port and traffic is routed to whatever value you set in the Port field, so your app must listen on that same port (for example, 8080). Do not rely on a PORT environment variable, as seenode does not provide one.
::::
Package Scripts
Ensure your package.json includes the following scripts:
{ "name": "example-nodejs-express", "version": "1.0.0", "main": "main.js", "scripts": { "start": "node main.js" }, "dependencies": { "express": "^4.18.2" }}Run npm install to create your package-lock.json file.
Deploy on seenode
Push to Git
Commit your project and push it to GitHub or GitLab.
Create a Web Service
From the seenode Dashboard, create a new Web Service and connect your Express.js project’s Git repository.
Configure Build & Start
seenode attempts to detect these automatically. Configure:
- Build Command:
npm install - Start Command:
node main.js
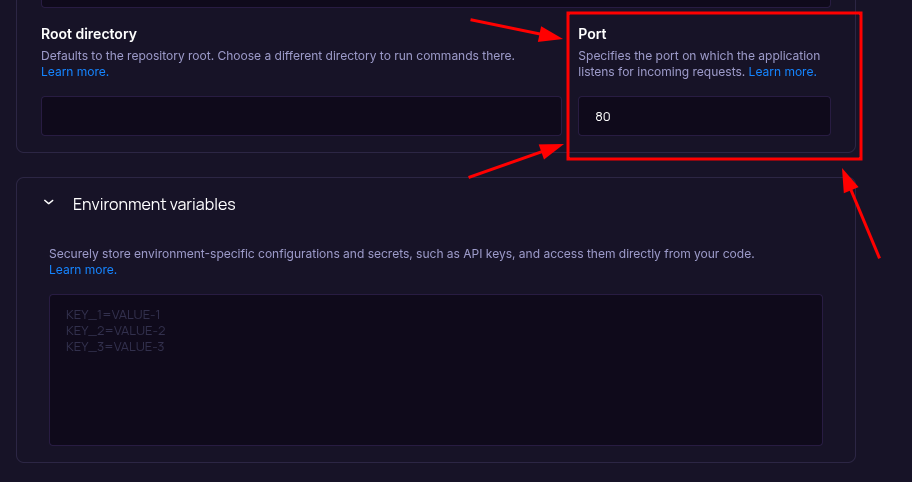
Set the Port field (above Environment Variables) to the value your app listens on (for example,
8080). Ensure yourapp.listen(…)call uses the same port. The field starts empty, so set it before your first deploy. After the service is created, you can change the port from the project’s Settings tab.- Build Command:
Configure Environment Variables
Configure any other environment variables your app needs in the Environment section. You do not need to add a
PORTenvironment variable.Choose Pricing Tier
Select your preferred instance size and create your service.
Deploy
Click Create Web Service and watch logs until your web service is live.
Success
Once complete, your Express.js application is accessible via your service’s URL.
::::tip[Troubleshooting] If your deployment fails, the first place to check is the Logs tab in your seenode service dashboard. Build and runtime logs often contain valuable information for diagnosing issues.
Port configuration mismatch
- On seenode, there is no default container port. Ensure your application listens on the port you configured in the Port field.
- Update your framework code if needed (for example, change the port value in
const port = 8080;or yourapp.listen(...)call to match the Port field). - Seeing a 502 Bad Gateway? Your app may not be listening on the expected port. ::::
Starting from Scratch?
If you don’t have an Express.js project yet:
Option 1: Use our Template (Recommended)
Express.js Template
Deploy an Express.js project pre-configured for production.Option 2: Create from Express Docs + seenode Setup
Follow the official Express documentation to create a new project, then return here for seenode-specific deployment steps.
seenode-Specific Setup Steps:
- Create
main.jswith Express server - Configure your server to listen on the port you’ll set in the dashboard (for example,
8080) - Set up package.json with start script
Next Steps
Now that your Express.js application is deployed, here are some things you might want to do next:
Set up a Custom Domain (Coming Soon)
Configure a custom domain to point to your new web service.Connect to a Database
Instantly scaffold and connect PostgreSQL and MySQL databases